Beginner’s Resin Pour with Acrylic Paint (Messy but Fun Guide)
My First Resin Pour with Acrylic Paint: A Beginner’s Guide
When I did my very first resin pour, I was nervous, excited, and—let’s be honest—clueless.
I’d seen the glossy finishes and the dreamy, flowing colors online, and I thought, “How hard can it be?”
Spoiler: I mixed the resin too fast, trapped a ton of bubbles, and then watched them pop up like uninvited party guests.
The truth is, resin pouring looks effortless in videos, but the learning curve is real.
The good news? Once you know the basics, it becomes fun instead of frustrating.
This post is the guide I wish I had when I poured resin for the first time—so you can skip some of the messy trial-and-error I went through.
What You Need Before You Start
Essential Materials
You’ll need a two-part epoxy resin (resin + hardener), acrylic paints, cups, stir sticks, and a sturdy surface like canvas or wood.
Protect your table with plastic sheets, and have gloves and wipes nearby.
I’ll never forget the first time I didn’t cover my table properly. Resin dripped onto the wooden edge, and to this day, there’s a glossy blob stuck there. Now it’s my “resin badge of honor,” but trust me—you’ll want to avoid that.
Safety Equipment
Resin isn’t something you treat casually.
Wear nitrile gloves, safety glasses, and if your space doesn’t have great airflow, a mask designed for organic vapors.
When I first started, I thought cracking open a window was “good enough.” Ten minutes in, I realized resin fumes aren’t just a smell—they’re chemicals.
Now I take safety seriously, and I enjoy the process more knowing I’m protected.
Choosing the Right Workspace
Pick a level surface that resin can sit on for at least 24 hours without being touched.
Resin likes peace and quiet while it cures.
Also—dust is sneaky. My first pour ended up with a stray hair smack in the middle of the glossy surface. I tried to pick it out (bad idea), and the mark never went away. Lesson learned: cover your project with a clean box or food nets they sell on Amazon for buffets, while it cures.
Preparing Your Resin and Acrylic Paints
Measuring Resin and Hardener Correctly
Most resin brands mix 1:1. Measure carefully—too much of one side and it won’t cure properly.
Use a digital scale or marked cups. Check out this article to know which resin you are using, and how to measure it.
I once eyeballed the amounts because I didn’t want to “waste time measuring.” The piece stayed tacky for days, and I eventually had to throw it out. That mistake cost me more resin than I saved.
Mixing Resin Without Bubbles
Pour one liquid at a time, then stir slowly for at least 3 minutes.
Scrape the sides and bottom as you go.
If you stir too quickly, you’ll get foam. I made that mistake and thought, “Oh, the bubbles will just disappear.” Nope. They hardened right into the surface. Slow and steady mixing makes all the difference.
Adding Acrylic Paint Safely
Add just a little paint at a time. Too much paint can weaken the resin and turn it cloudy.
Stick to high-quality paints for the brightest colors.
Step-by-Step Resin Pouring Process
Preparing the Canvas or Surface
Seal porous surfaces (like wood or canvas) first.
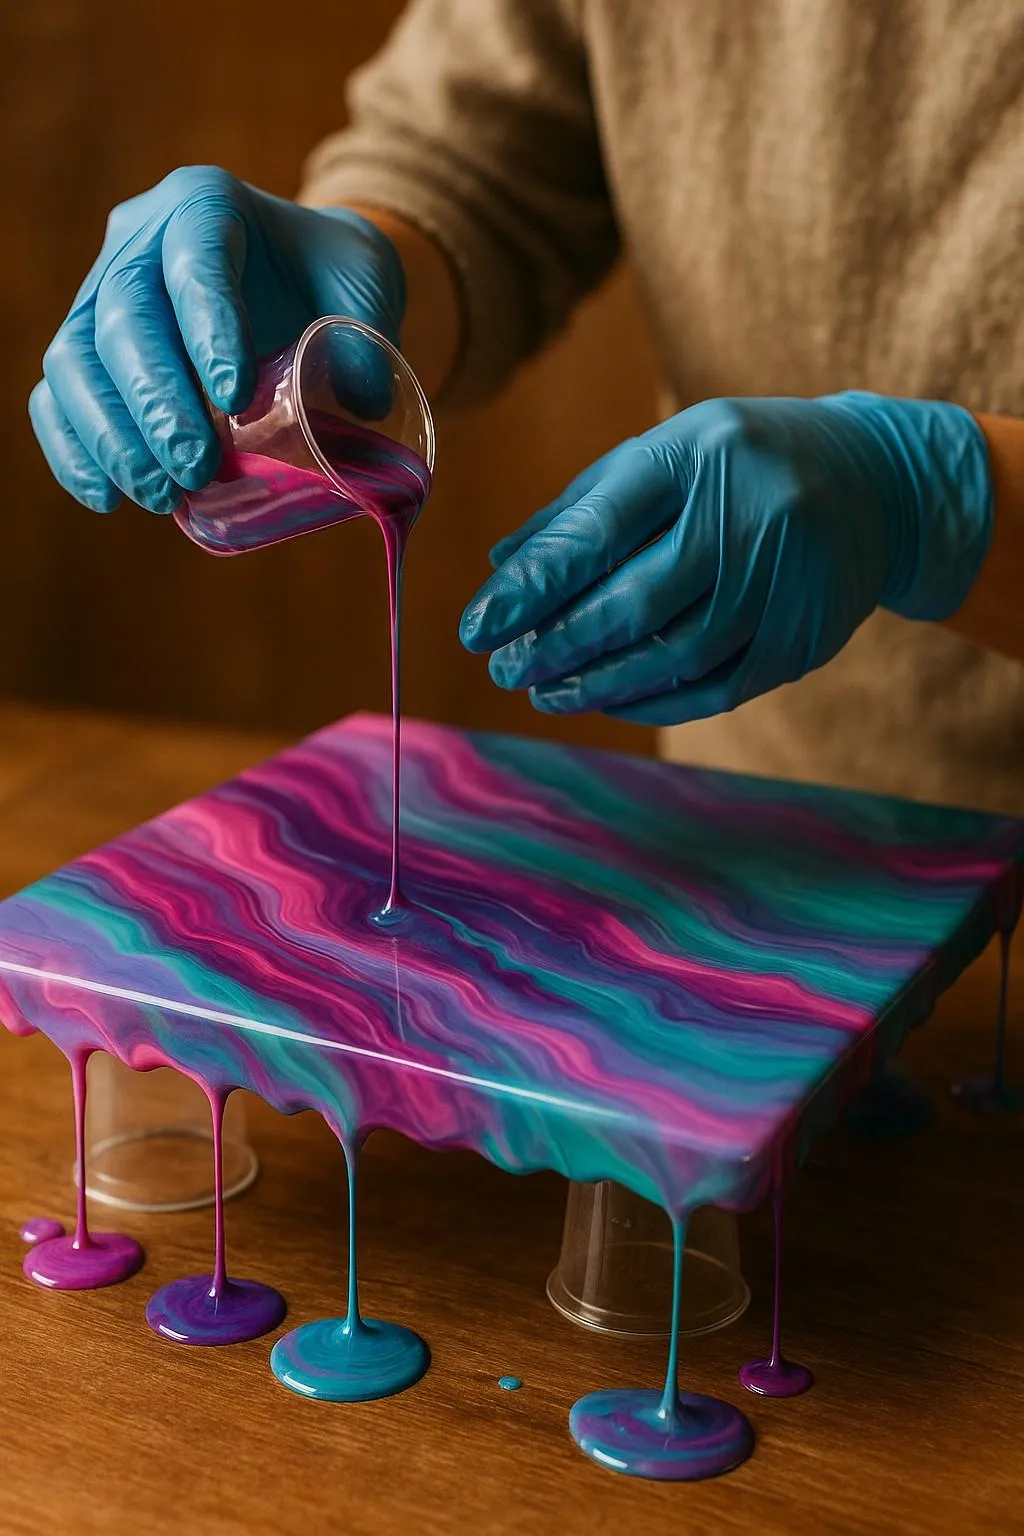
Prop your piece on cups so resin drips off the sides instead of gluing it to your table.
Use a level—it matters more than you think.
Layering Resin and Paint
Start with a clear resin base, then add colored resin layers.
Pour in sections and let the resin spread. Don’t overwork it or your colors will turn muddy.
Pouring Techniques to Try
Dirty Pour: Mix all your colors into one cup and pour at once.
Separate Pours: Pour each color individually for more control.
Tilt & Flow: Tilt the canvas to let resin move naturally.
A heat gun or torch helps with bubbles, but keep it moving. I scorched my first attempt because I thought “just a little longer” would smooth things out. Instead, I got a burnt patch that still makes me laugh (and cringe).
Curing, Finishing, and Troubleshooting
How Long Resin Takes to Cure
It usually sets in 12 hours and fully cures in 24–72.
Cover your work to protect it from dust.
And resist the urge to touch it—even a tiny poke can leave a fingerprint you’ll never forget.
Fixing Common Mistakes
Sticky finish = wrong resin ratio.
Cloudy look = too much paint or humidity.
Bubbles = not enough heat or slow mixing.
Most issues can be fixed with sanding and another thin resin layer.
Finishing Touches for a Glossy Look
Sand drips off the edges with a sander or manually with sand paper..
For extra shine, add a flood coat (a thin layer of clear resin) once the first coat cures.
It’s like adding a glass top to your art.
Conclusion: Your Resin Journey Begins Here
Your first resin pour might feel messy, unpredictable, or even frustrating. Mine sure did.
But each pour gets better, and the glossy finish at the end makes the effort worth it.
One of my favorite things about resin is that no two pieces ever look the same. Even mistakes turn into something beautiful.
So don’t stress if your first attempt isn’t “perfect.” It’s part of the journey.
Take photos of your work, share them, and most importantly—keep experimenting.
Your first resin pour is just the beginning of an addictive (and very shiny) new hobby.
Keep Learning with These Helpful Guides
To deepen your resin journey, check out these related posts:
And don’t forget to revisit:
*
Here’s a **short bio** for your **Resin Art 101 blog page**, reflecting your experience and drawing from your My Flower Keepsake journey:
---
🌸 I’m Chana, a self-taught resin artist & keepsake maker with years of trial, error & discovery under my belt. I turned my passion into *My Flower Keepsake* — where I preserve life’s most meaningful moments in resin. Through Resin Art 101, I share practical tips, beginner-friendly guidance, and the lessons I wish I knew when I started. Whether you're pouring your first mold or dreaming of selling your art, you're in the right place. 🎨✨](https://storage.googleapis.com/msgsndr/DZXaqlJLOJn0oYspzne6/media/66fac7cb233878c3551bdf82.png)