The 5 step formula to mix resin like a pro
How to Mix Resin Like a Pro: The 5-Step Formula I Wish I Knew Sooner
When I first started with resin art, I thought mixing was simple: combine the two parts, stir, and pour. But after multiple sticky, bubbly, or ruined pieces, I realized mixing resin is where most beginners fail.
With years of trial and error through my work at My Flower Keepsake, I’ve perfected a simple 5-step formula that guarantees consistent, crystal-clear results—every single time.
🌟 Why Proper Mixing is the Key to Perfect Resin Art
Mixing is more than combining two liquids. It’s a chemical process that requires the right technique to ensure your resin cures hard, clear, and bubble-free. Poor mixing is the #1 reason for:
Soft, uncured spots
Milky or streaky pours
Trapped bubbles that won’t release
Resin that cracks or yellows too soon
🧪 The 5-Step Formula for Mixing Resin Like a Pro
Step 1: Prep Your Workspace Before You Pour
One of the biggest mistakes I made early on was diving straight into mixing without preparing my space. Resin starts curing the moment you combine the parts, so having everything ready avoids rushing.
✅ Pro Tip: Lay down a silicone mat or parchment paper, have your molds, pigments, and stir sticks ready, and wear nitrile gloves. A clean, organized workspace means a calm, controlled mix.
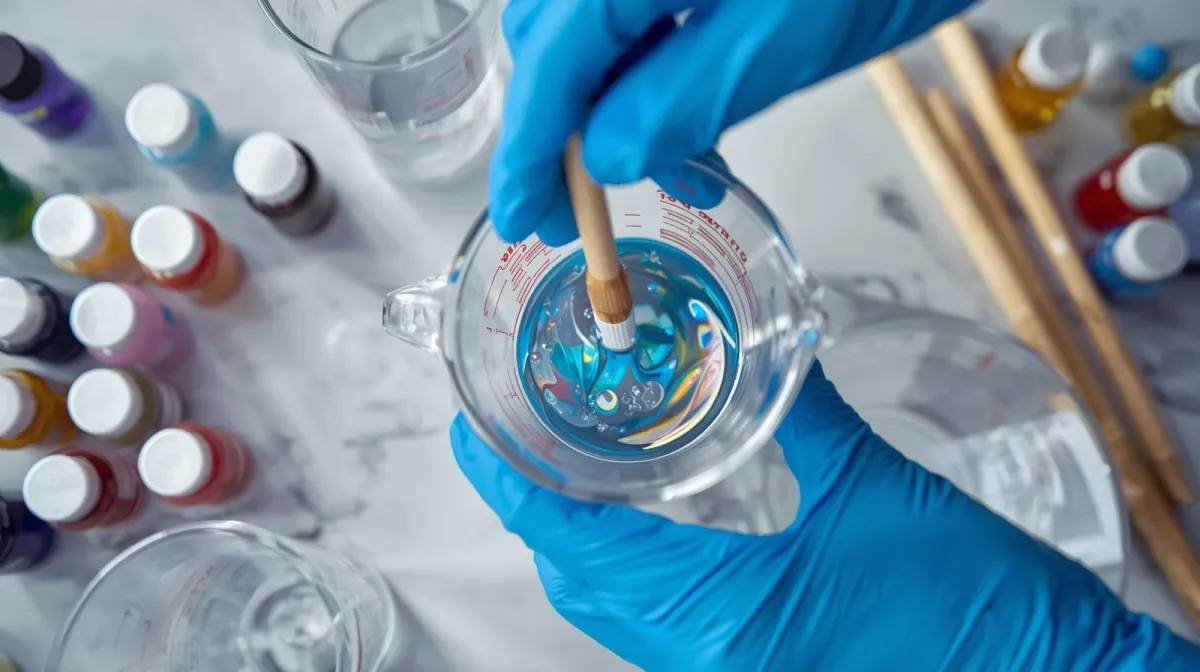
Step 2: Mix Slowly and Steadily
Don’t stir fast like cake batter. Rushing introduces bubbles that are tough to get out later.
✅ Pro Tip: Use a flat stir stick and mix gently for 3–5 minutes, scraping the sides and bottom continuously. Mix until the resin looks clear and uniform with no streaks.
Step 3: Warm the Resin for a Smoother Blend
Cold resin is thick and traps bubbles easily. Warm resin blends like honey, making the mixing process easier and reducing air pockets.
✅ Pro Tip: Place your sealed bottles in warm (not hot) water for 10–15 minutes before you measure and mix. This simple step can be the difference between a cloudy and crystal-clear pour.
Step 4: Mix in Small Batches at First
Large amounts of resin generate heat quickly and start curing faster, which can overwhelm beginners.
✅ Pro Tip: Begin with smaller amounts until you learn how your resin behaves. It’s far easier to mix more later than to fix a batch that cures too soon or overheats.
Step 5: Control the Temperature of Your Room
Resin is highly sensitive to the environment. A cold room leads to soft or uncured resin; a hot room can make it set before you’re ready.
✅ Pro Tip: Keep your workspace around 70–75°F (21–24°C). Stable temperatures mean fewer bubbles, better flow, and a perfect cure.
🚨 Common Beginner Mistakes
Skipping workspace prep and rushing into mixing
Stirring too quickly or for too short a time
Mixing resin straight from a cold storage room
Not scraping the sides and bottom while stirring
Mixing huge batches without experience
I made every one of these mistakes in my early days, which is why I can tell you confidently: mixing is where your resin art either succeeds or fails.
🧼 Safety Reminder
Even when mixing small amounts, resin is still a chemical. Always work in a ventilated area, wear nitrile gloves, and protect your workspace. If you’re working frequently, consider a respirator for added safety.
🌸 Why This Matters for Keepsakes
At My Flower Keepsake, every pour holds meaning—wedding bouquets, memorial flowers, and once-in-a-lifetime moments. Proper mixing ensures these keepsakes stay perfect for years. If you’re making a gift or preserving a memory, this step is what protects it forever.
📌 Final Thoughts
Mixing resin isn’t just another step in the process—it’s the foundation of beautiful, durable resin art. By prepping your workspace, mixing slowly, warming your resin, and controlling your environment, you’ll avoid the sticky disasters most beginners face and achieve flawless results every time.
🔗 Stay Connected:
Instagram: @myflowerkeepsake
Facebook: My Flower Keepsake
Website: www.myflowerkeepsake.com
Go make something beautiful!!
Chana xoxo
*
Here’s a **short bio** for your **Resin Art 101 blog page**, reflecting your experience and drawing from your My Flower Keepsake journey:
---
🌸 I’m Chana, a self-taught resin artist & keepsake maker with years of trial, error & discovery under my belt. I turned my passion into *My Flower Keepsake* — where I preserve life’s most meaningful moments in resin. Through Resin Art 101, I share practical tips, beginner-friendly guidance, and the lessons I wish I knew when I started. Whether you're pouring your first mold or dreaming of selling your art, you're in the right place. 🎨✨](https://storage.googleapis.com/msgsndr/DZXaqlJLOJn0oYspzne6/media/66fac7cb233878c3551bdf82.png)